| Step 1 | Fill the schematics box with schematics! (hub is on the board in the back). Set the box as the "Schematics Container" for the construct (the container is above the T1 line in the back) For each line you plan on offering to your customers, ensure you have enough Product Honeycomb and Product Material for those tiers. |
|---|---|
| Step 2 | Edit the Lua Parameters on the Programming Board (inside the factory at the front), and ensure there are reasonable values/limits in each field. There is a switch in the parameter that will print the internal ID numbers for each org you are in. Turn it on and power up the board; your orgs will appear in the Lua console. If you'd like to restrict operation of the Vox-in-a-Box to just a single org, you can type in the org number into the correct Lua parameter. (You can also use RDMS to restruct access if you'd prefer). Make sure you uncheck the box once you have your org's ID number. To use RDMS for access control, and therefore to disable org restrictions enforced by the Vox-in-a-Box, enter a '0' in the org number field. You can also disable both RDMS security and this parameter - the machine will be usable by everyone, then. (Think carefully before doing this) |
| NOTE/FYI | For the next 6 steps... the purpose of each industry is also in its name, as well as in the pictures below. To see the name in-game, simply mouse-hover over the industry and look at its name. (You will see some containers with large numbers - those are set so the tall screen in the back can calcuate capacities, and their names can't be changed.) Also, "comfort" is defined as values that are as large as possible (to have plenty of material pre-prepared for creating voxels) but yet not too much, so that too much quantities of ore are prepared. In most cases there's a "minimum" value that you'll need to set - for example, most T1 processing require a minimum of 1800 to create a single "batch". You'll probably want to use much higher values, but try to avoid filling the containers completely if possible. Experimentation will yield the best values for your situation. Numbers from 5k to 50k are probably reasonable for many cases. |
| Step 3 | Set these "Maintain" levels on the Tier 1 Line to comfortable values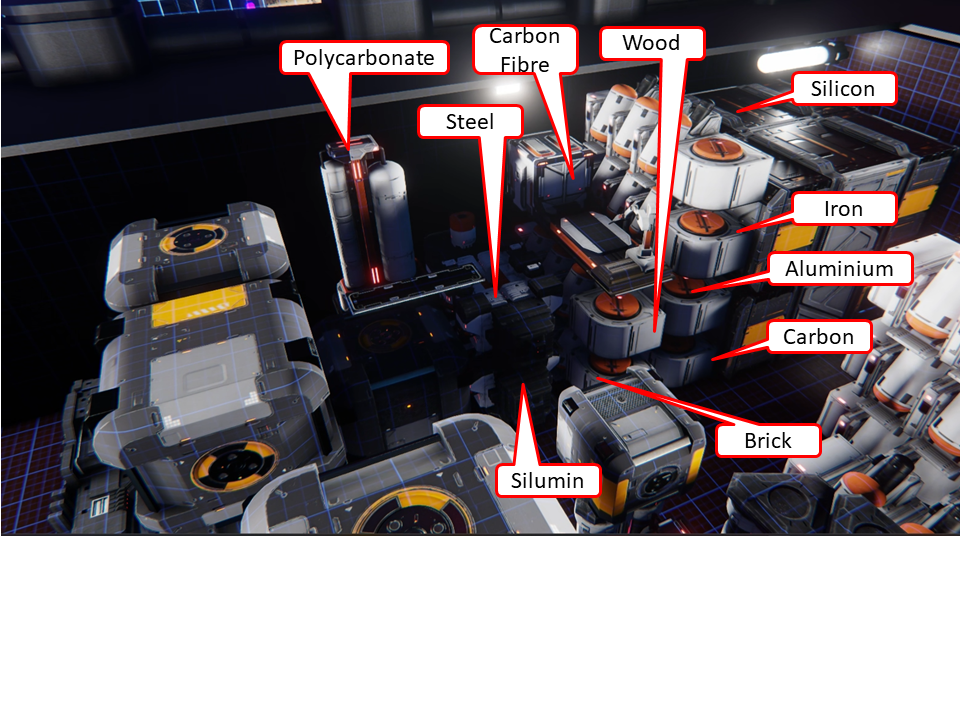 |
| Step 4 | Set these "Maintain" levels on the Tier 2 Line to comfortable values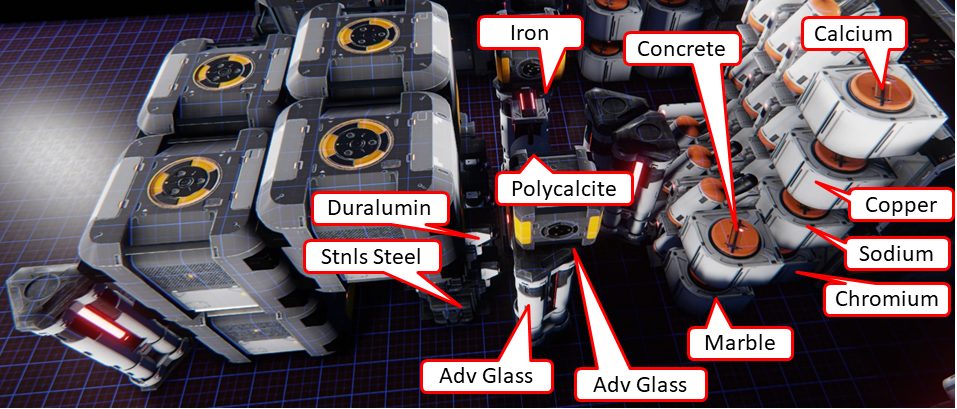 |
| Step 5 | Set these "Maintain" levels on the Tier 3 Line to comfortable values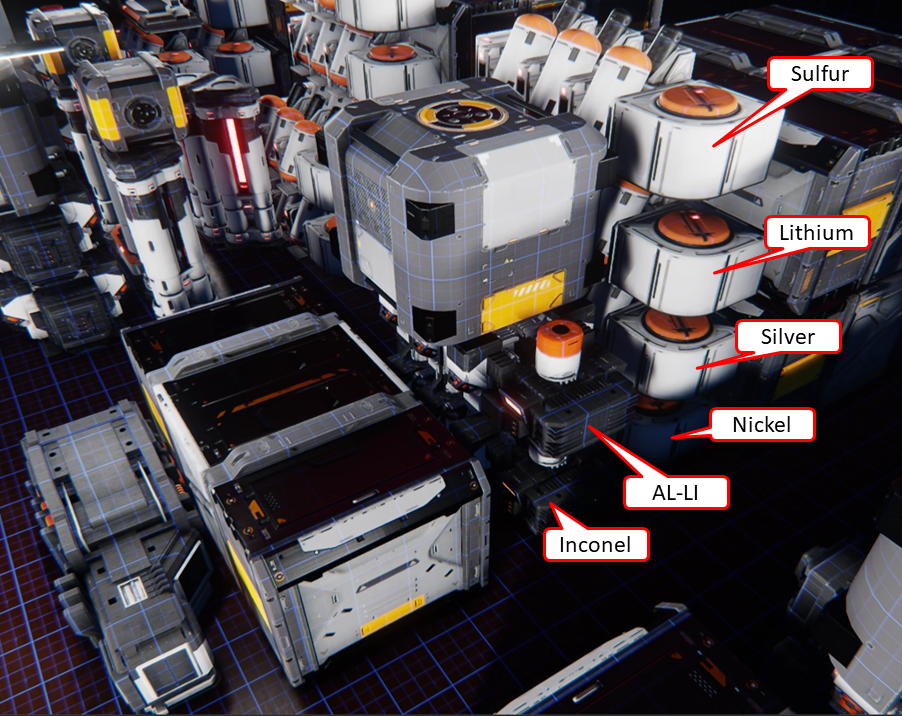 |
| Step 6 | Set these "Maintain" levels on the Tier 4 Line to comfortable values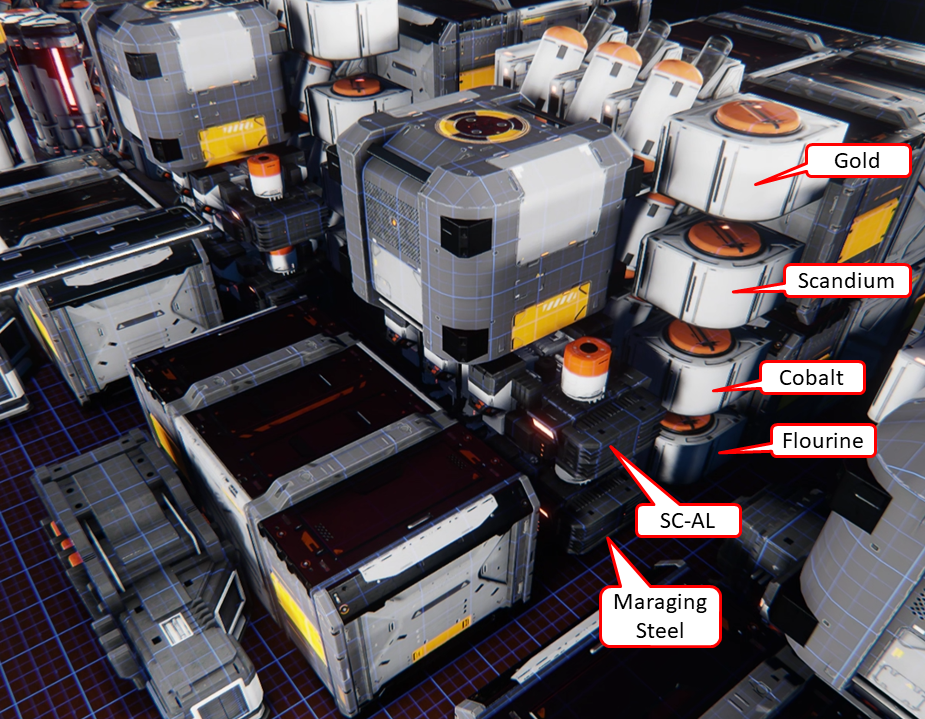 |
| Step 7 | Set these "Maintain" levels on the Tier 5 Line to comfortable values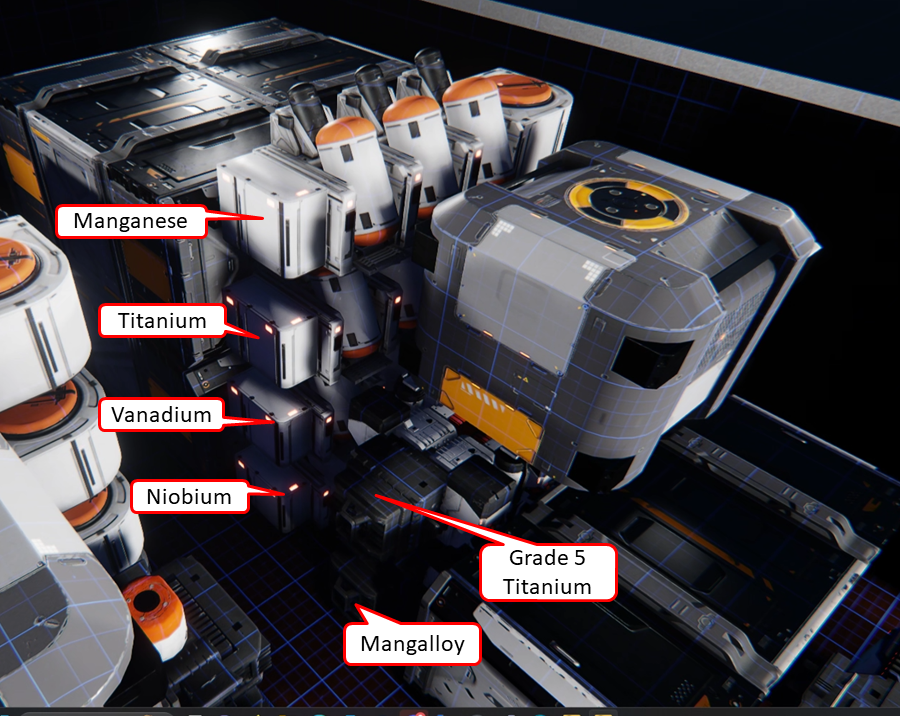 |
| Step 8 | Set these levels on the Hydrogen/Oxygen Line (The Hydrogen and Oxygen recyclers specifically need Maintain 5000), and anything marked "Run" should be set to Run, not Maintain) 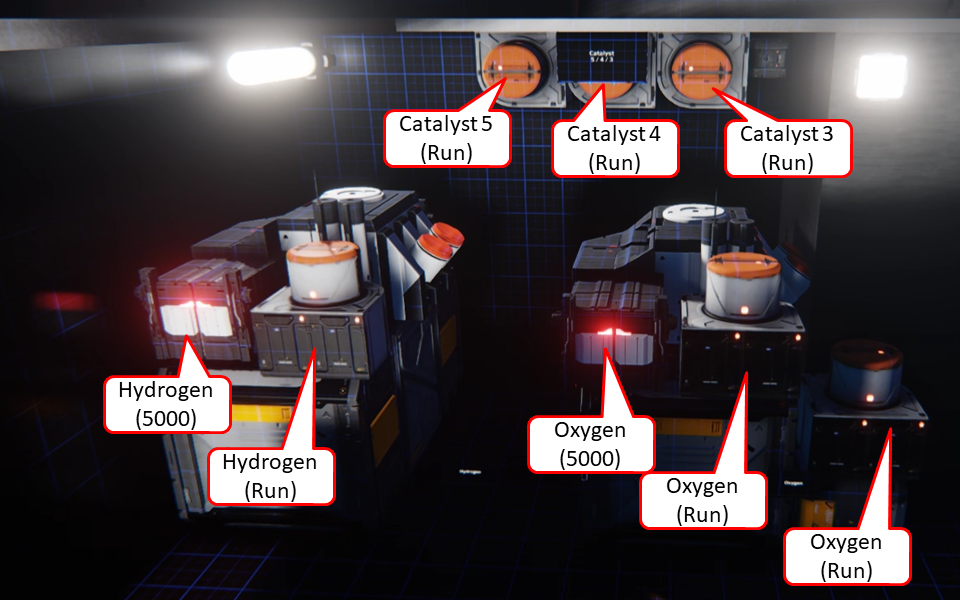 . Put 20 each of catalyst 3/4/5 in the X-small box to the right of the three transfer units at the top of the machine. . Put 20 each of catalyst 3/4/5 in the X-small box to the right of the three transfer units at the top of the machine. |
| Step 9 | Over a (long) time, the levels of Hydrogen and Oxygen will fill the 2 Basic L Containers in the front of the factory. Periodically check the levels in these containers and ensure they do not fill to 100%. Check the levels on the screen near the rear exit. If these containers fill, then industry will not run. |